Quick DIY Ways to Check Your Home for Air Leaks (And What to Do About Them)
Hand / Candle Draft Check
What you need: Wet hand, or a candle/incense/lighter
How to test:
- Close all doors and windows; turn off fans.
- Wet hand: Slowly trace around the edges of windows and doors feel for cold air blowing in.
- Candle/incense/lighter: If the flame flickers or the smoke dances, you’ve found a draft.
How to fix what you find:
- Around window/door frames:
- Small gaps: Use caulk around trim and frames.
- Larger gaps: Use low-expansion spray foam made for windows and doors.
- Bottom of doors:
- Add or replace a door sweep.
- Loose latches or hardware:
- Tighten screws or adjust the latch so the door/window closes snugly.
Flashlight Gap Check
Best at night. What you need: Strong flashlight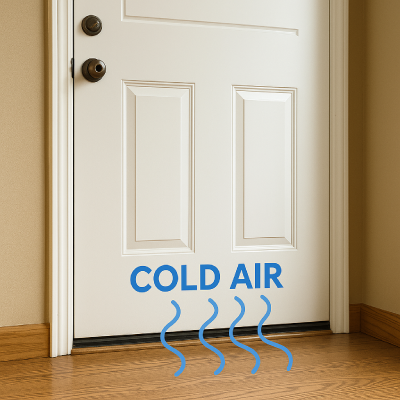
How to test:
- One person inside, one outside (if possible).
- Shine the flashlight around the edges of closed doors/windows.
- If light shines through the sides, there’s a path for air, too.
How to fix what you find:
- Light at sides or top of door:
- Replace worn weatherstripping on the frame.
- Light under the door:
- Install or adjust the door sweep or threshold.
- Light between trim and wall:
- Seal gaps with paintable caulk.
Paper Pinch Test (Weatherstripping Check)
What you need: A sheet of paper
How to test:
- Close the door or window on the paper.
- Try to pull it out.
- If it slides out easily, the seal isn’t tight.
How to fix what you find:
- Loose paper = weak seal:
- Install or replace weatherstripping around the door or window frame.
- Check and adjust the door hinges or strike plate so the door closes squarely.
- For doors, add or adjust the threshold to get a better seal at the bottom.
Smoke Pencil / Draft Detector Tool
What you need: Smoke pencil or digital draft detector
How to test:
- Run it slowly along frames, outlets on exterior walls, attic hatches, and baseboards.
- Watch for smoke movement or sudden temperature changes.
How to fix what you find:
- Around windows/doors:
- Caulk small cracks, replace weatherstripping, and add door sweeps as needed.
- Around baseboards or trim:
- Use caulk where trim meets the wall or floor.
- Around attic hatch:
- Add adhesive weatherstripping around the hatch and insulate the back of the hatch panel.
Infrared Thermometer or Thermal Camera (less DIY friendly, but doable)
What you need: Infrared thermometer or thermal camera/phone attachment
How to test:
- Scan around windows, doors, outlets on exterior walls, and ceiling/attic areas.
- Look for noticeably colder spots compared to surrounding areas.
How to fix what you find:
- Cold streaks around windows/doors:
- Same playbook: caulk, weatherstripping, and sometimes interior window film kits for older windows.
- Cold outlets/switches on exterior walls:
- Turn off the breaker and install foam gasket inserts behind outlet and switch plates.
- Cold spots near ceiling/attic:
- Add insulation in the attic and seal around penetrations (plumbing stacks, light fixtures, etc.) with caulk or appropriate foam.
Spending 10–15 minutes hunting for drafts may not feel glamorous, but it pays off:
- More comfort: Sealing up those leaky doors and windows helps eliminate chilly spots and mystery cold rooms, so your home actually feels like the thermostat says it should.
- Less strain on your system: When warm air isn’t constantly escaping, your furnace doesn’t have to cycle as often or run as long. That means less wear and tear on motors, heat exchangers, and other components.
- Lower energy bills: Every gap you seal is one less place you’re literally paying to heat the outdoors. Over a full Wisconsin winter, that can add up to real money.
Do a quick round of these tests once a year—especially before heating season—and you’ll keep more heat inside, keep your equipment happier, and give your utility bill a bit of a break.
FREE OFFER FROM WI FOCUS ON ENERGY
A door sweep and weatherstripping are part of the free Focus on Energy comfort pack. Get Your Free comfort pack Today!